3D Chrome-Black Octavia Trunk Logo Sticker (Skoda)
3D Chrome Black Octavia Rear Trunk Logo Sticker for Skoda
A clean rear-end finish can make a big difference on a Skoda Octavia. This 3D chrome-black trunk logo sticker adds a sharp, factory-style look while keeping installation straightforward for most owners who want a quick exterior refresh. Whether you’re updating a worn badge or matching a blacked-out trim theme, a raised emblem-style sticker can tighten up the car’s overall presentation in minutes—without swapping parts or drilling.
What This Rear Trunk Emblem Sticker Adds
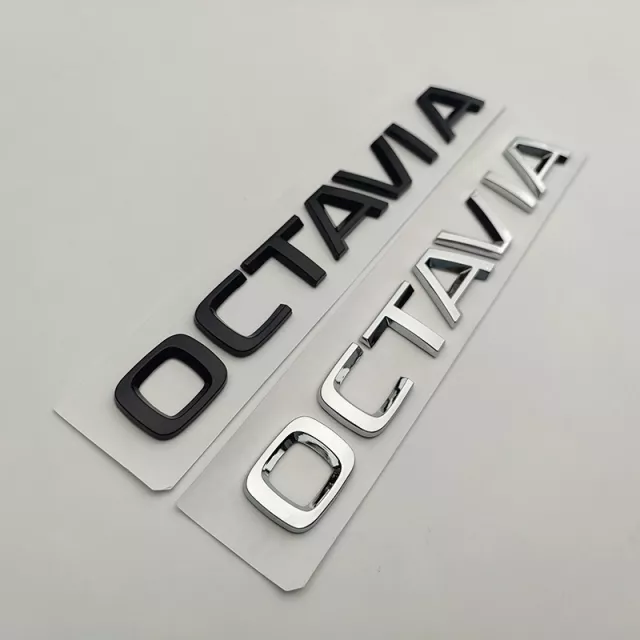
- 3D raised lettering effect to give the trunk badge more depth than flat decals.
- Chrome-black finish that pairs well with dark trim, tinted glass, and black wheels.
- Quick visual update for older badges that look faded, scratched, or mismatched.
- Subtle styling that refreshes the rear view without changing any body panels.
Design, Finish, and Build Details
This style is meant to read like a badge from a few feet away, not a printed graphic. The raised emblem profile creates a shadow line that helps the lettering stand out, especially on lighter paint colors. On darker paint, the chrome-black tone tends to look more “integrated,” blending into gloss trim while still offering a crisp outline.
- Raised emblem look: designed to resemble a badge rather than a flat sticker.
- Modern chrome-black contrast: a darker metallic effect that complements black accents.
- Adhesive-backed application: intended for exterior vehicle surfaces when properly cleaned and prepped.
- Surface considerations: best results on smooth, fully cured paint and clean clearcoat (avoid porous plastics and textured trim unless tested first).
For best adhesion, surface prep matters as much as placement. A practical reference is general adhesive bonding guidance from 3M, which emphasizes cleaning away oils, waxes, and residue before applying pressure-sensitive adhesives.
Fit and Placement on the Skoda Octavia Trunk
Typical placement is on the rear trunk lid near the OEM model marking area. If you’re replacing an existing badge, use the current position as your template before removing anything. If the trunk has been repainted, swapped, or debadged by a previous owner, take an extra minute to measure and align so the emblem sits level with the car’s design lines.
- Check the existing badge position and spacing before removal to keep alignment consistent.
- Measure left/right spacing from trunk edges or reference lines (tail light edge, trunk crease) to keep it level.
- Confirm the surface is flat enough for full adhesive contact to reduce lifting at corners.
Placement and Prep Checklist
| Step | What to do | Why it matters |
|---|---|---|
| Dry fit | Hold the emblem in place and view from multiple angles | Prevents crooked placement and uneven spacing |
| Clean | Wash, then wipe with isopropyl alcohol on a lint-free cloth | Removes wax/oils so adhesive bonds properly |
| Mark guides | Use low-tack masking tape for a baseline and side markers | Keeps installation straight without permanent marks |
| Warm surface | Apply in mild temperatures or gently warm the panel | Improves adhesive tack and reduces edge lift |
| Press and set | Apply firm, even pressure across the whole emblem | Helps adhesive fully wet-out to the paint |
Installation Steps (Clean, Align, Apply)
A careful install is what makes a badge look factory rather than “stuck on.” Plan for a few minutes of prep, then apply slowly and deliberately.
- Remove old residue (if replacing a badge): Use a paint-safe adhesive remover and a plastic trim tool. Avoid metal blades on paint.
- Final wipe: Clean the exact placement area with isopropyl alcohol, then allow the panel to fully dry.
- Align with guides: Create a baseline with masking tape and align visually with trunk creases and tail light edges.
- Peel and apply gradually: Peel the backing slowly and apply from one side to the other to reduce trapped air and improve control.
- Press firmly: Apply even pressure for 30–60 seconds across the entire emblem, focusing on edges and corners.
- Let it cure: Avoid washing the car or exposing it to heavy rain for at least 24 hours when possible.
Care, Washing, and Removal Tips
Once installed, normal washing is fine, but the first day matters most while the adhesive fully bonds. For ongoing maintenance, gentle cleaning helps preserve the finish and reduce the chance of edges lifting over time.
For general washing best practices—especially around trim, badges, and edges—guidance from the International Carwash Association is a useful baseline.
When This Style Works Best
Product Snapshot
- 3D Chrome Black Logo Octavia Rear Trunk Sticker for Skoda – Car Emblem — a budget-friendly add-on designed to be applied to a clean, smooth trunk surface using the pre-applied adhesive backing.
- Crystal Moon & Star Car Vent Clips — a simple interior accent that pairs nicely with a refreshed exterior badge for a more personalized cabin feel.
FAQ
Will the emblem damage the paint when removed?
Typically no when removed with gentle heat and slow lifting. Any leftover adhesive can usually be cleaned with a paint-safe adhesive remover—avoid sharp tools and take your time to reduce risk.
How long should the car stay dry after applying the trunk sticker?
Aim for about 24 hours without washing or heavy rain exposure so the adhesive can fully bond. In colder or more humid conditions, giving it a bit longer can help.
Can it be applied over wax or ceramic coating?
Adhesives bond best to clean, bare clearcoat. Wax and some coatings can reduce adhesion, so thoroughly clean the placement area and remove any residue before applying.


Leave a comment